

How to Mount Wall Cabinets for Electronics Safely and Smartly
Why Mounting Electronics Cabinets to the Wall Is Worth Doing Right
Wall-mounted electronics cabinets are one of those installations that look simple from the outside but carry a lot of real consequences if done wrong. You are not just hanging a shelf. You are anchoring equipment that could weigh anywhere from 30 to over 200 pounds, housing routers, switches, patch panels, AV receivers, and other gear that genuinely cannot afford to fall, overheat, or get damaged from vibration. So before you reach for a drill, it is worth slowing down and understanding exactly what a smart, safe cabinet installation actually involves. This guide walks through every major consideration, from wall structure to cable routing to load ratings, so you can make decisions that hold up over time.
Understanding Wall Structure Before You Begin
The first thing to get clear on is what your wall is actually made of. Drywall alone cannot support the kind of weight most electronics cabinets carry. You need to locate studs, concrete, or masonry depending on your install environment. In residential settings, wood studs spaced 16 or 24 inches on center are standard, and hitting at least two studs with your mounting bracket is the baseline requirement for a safe installation. In commercial or data center environments, concrete anchors or rated toggle bolts rated for static loads are more common. It is easy to underestimate this step, but wall type determines which hardware you need, which bracket works, and ultimately whether your install is structurally sound or a liability waiting to happen.
Choosing the Right Cabinet and Mounting Hardware
Not every cabinet is designed to be wall-mounted, and not every wall mount is rated for electronics enclosures. Before purchasing, check that the cabinet has pre-drilled keyhole or rail mounting slots along the back panel. For rack-style wall cabinets, look for welded steel construction with a weight rating that exceeds your total expected equipment load by at least 20 to 30 percent. On the hardware side, your lag bolts should penetrate at least 1.5 inches into solid wood studs. Anchor bolts for concrete should be expansion-style or sleeve anchors rated for the full load. A few key things to verify before buying:
- Cabinet has a verified static weight rating
- Mounting bracket is included or separately rated for that specific cabinet model
- Hardware includes corrosion-resistant fasteners if the install is in a humid or outdoor-adjacent space
- Cabinet depth is compatible with your equipment depth plus cable management clearance
- Ventilation or fan-mount options are available if the cabinet will house heat-generating devices
Layout Planning and Positioning for Performance
Where you mount the cabinet matters for more than aesthetics. Heat rises, so positioning your cabinet too high without ventilation planning can create a thermal problem over time. Equipment that generates significant heat, like amplifiers or dense network switches, needs clearance both above and below inside the enclosure. On the practical side, consider how cable runs will reach the cabinet. A poorly positioned enclosure means longer cable runs, more signal degradation risk, and messier cable management. Wall cabinets should ideally be mounted near power outlets and data drops, at a height that allows for comfortable access without a ladder during routine maintenance, and away from direct heat sources, moisture, and direct sunlight.
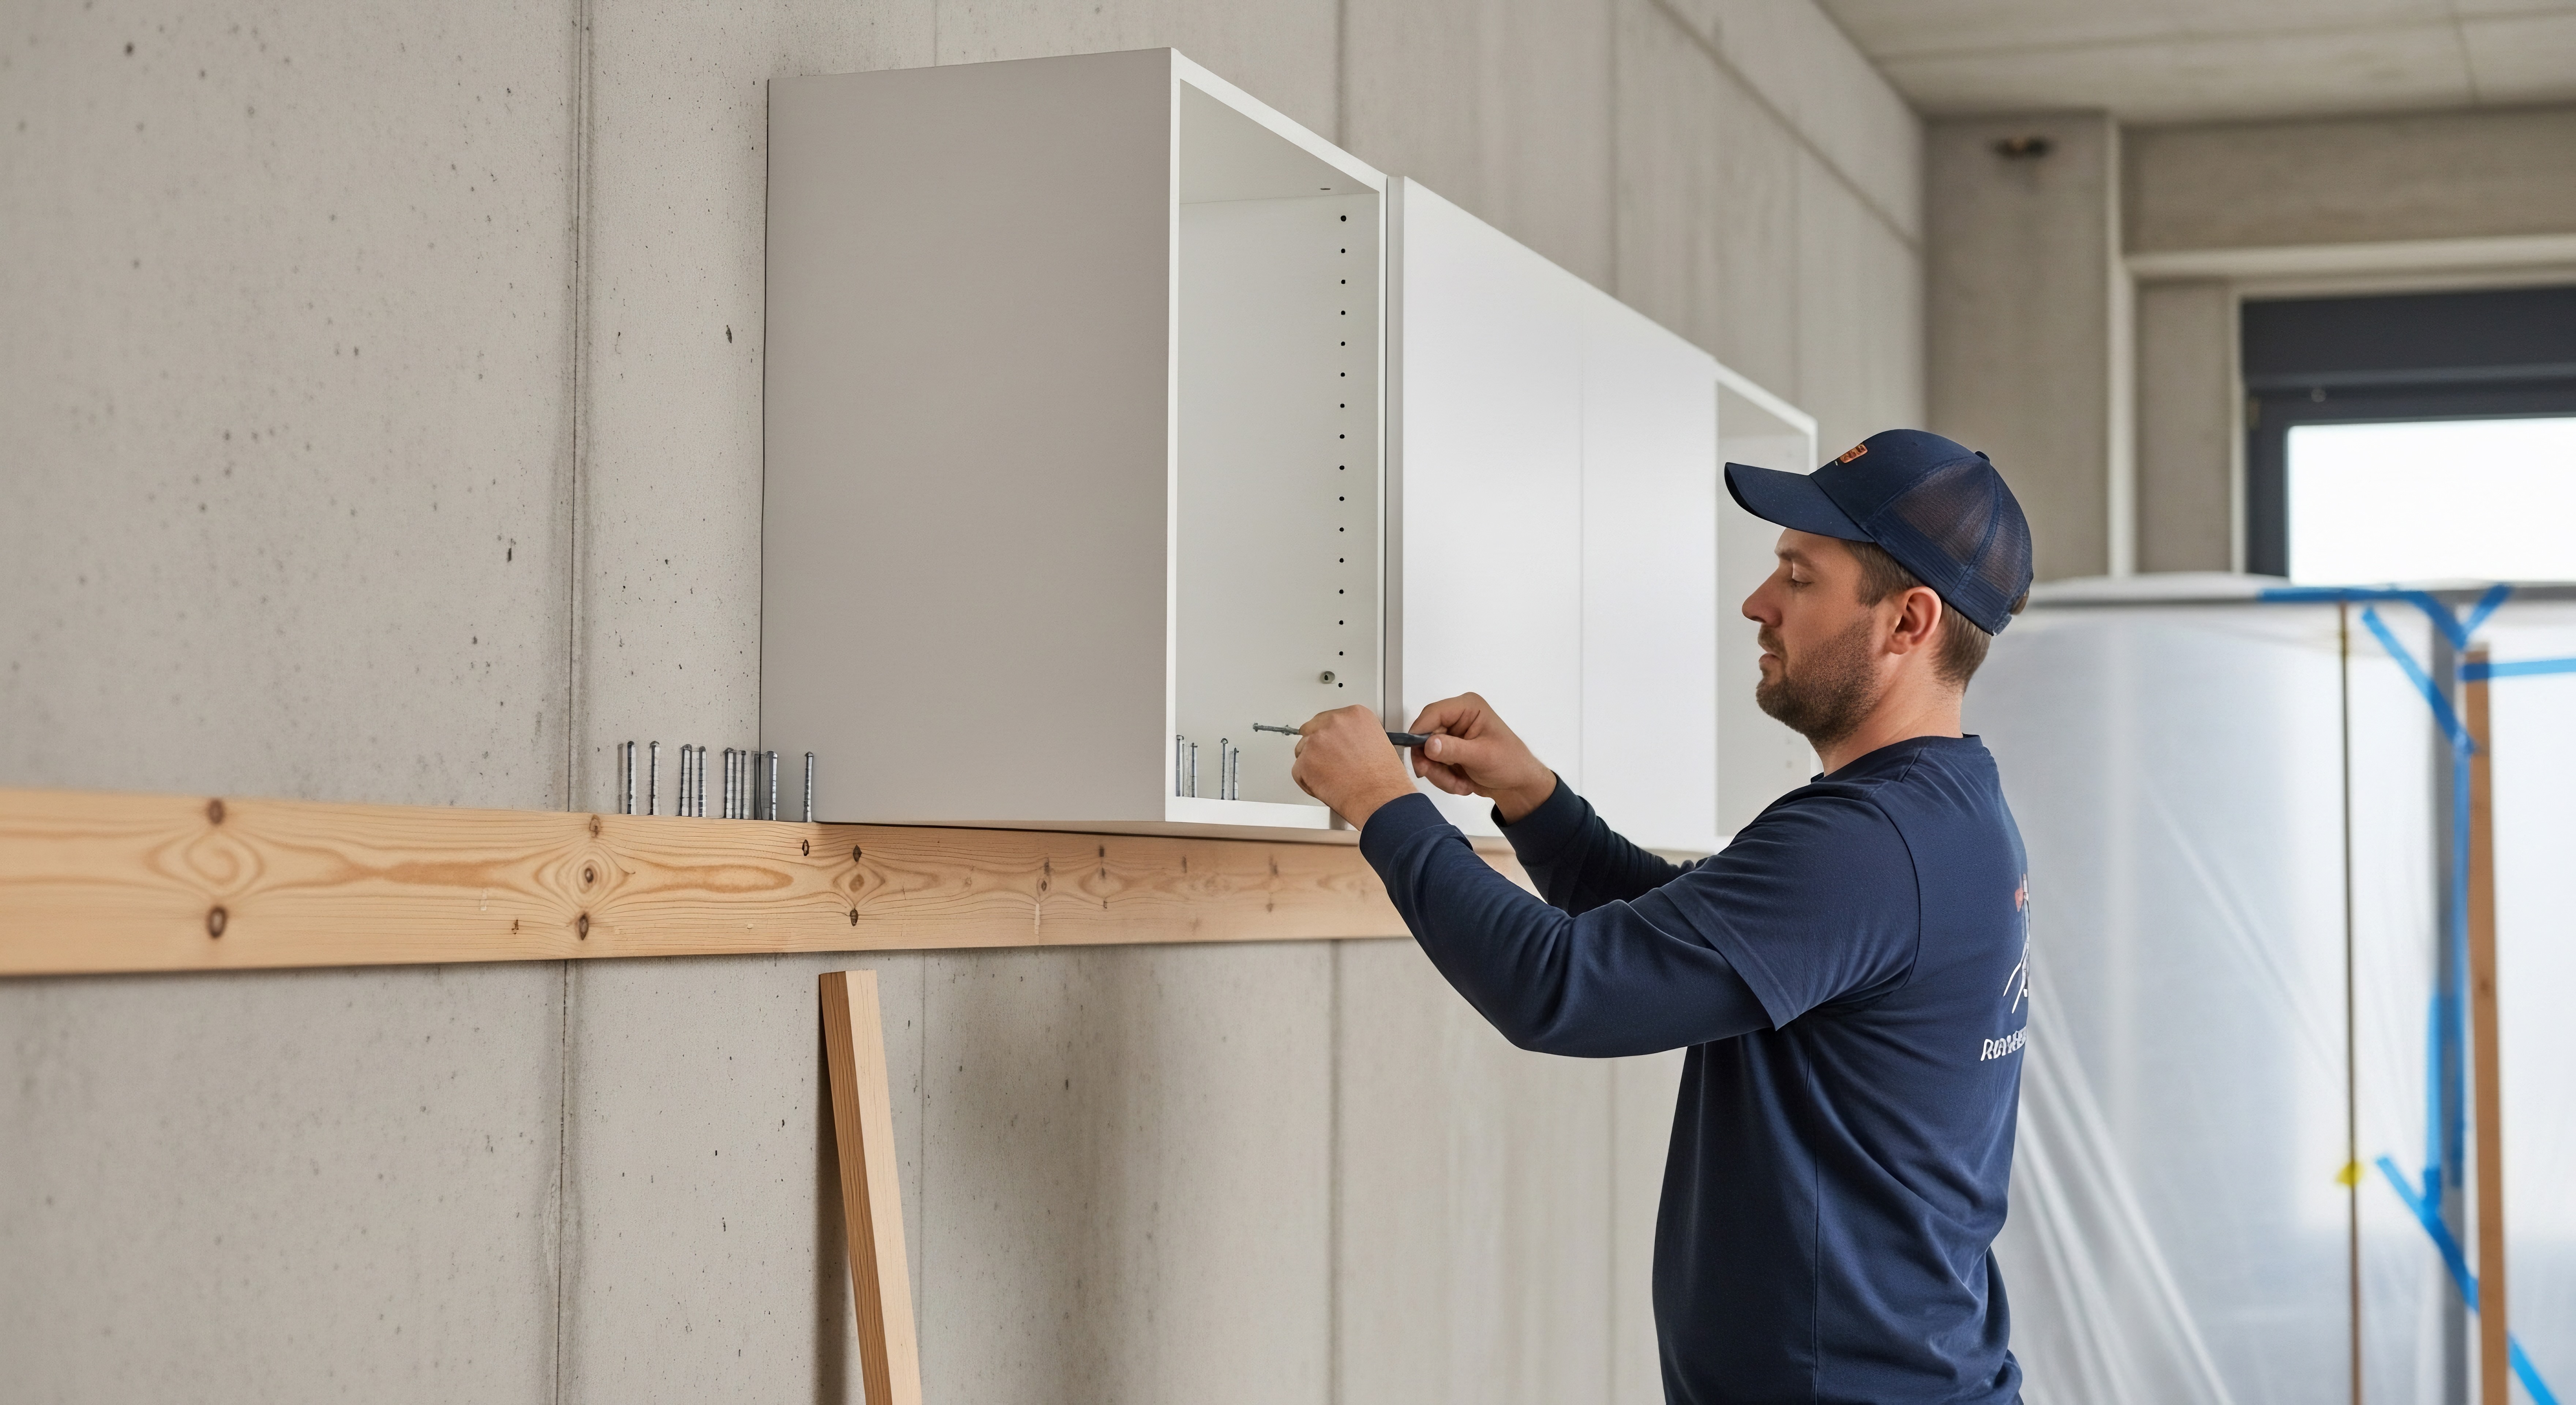
Step-by-Step Process for Attaching a Cabinet to the Wall
The actual mounting process is straightforward when you follow it in order. Rushing through any of these steps is where most installation problems originate.
- Use a stud finder to locate and mark all studs in the target area
- Hold the cabinet or bracket against the wall and mark the drill points
- Double check that your marks align with studs using a level
- Pre-drill pilot holes slightly smaller than your lag bolt diameter
- Drive lag bolts or anchors into the wall without over-torquing, which can strip the mounting hole
- Hang the cabinet on the bracket and check level again before securing any locking screws
- Conduct a firm pull test before loading any equipment
- Add cable pass-throughs and brush strips before routing cables into the enclosure
Grounding and Electrical Safety for Electronics Enclosures
This part gets overlooked more than it should. Any metal cabinet housing active electronics needs to be properly grounded. Static discharge in an ungrounded enclosure can damage sensitive equipment over time, and in worst cases, create a shock hazard for anyone maintaining the system. Bonding the cabinet chassis to a ground point in your electrical system is a straightforward step that should never be skipped. If you are mounting in a commercial environment, check local electrical codes for requirements around grounded enclosures. For residential installs, a grounding lug on the cabinet rail connected to a ground wire is typically sufficient. Also confirm that your power distribution unit inside the cabinet is surge-protected and rated appropriately for the equipment you are running.
Cable Management Inside and Outside the Cabinet
Good cable management is not just about looking clean. It directly affects airflow inside the enclosure, reduces stress on connector ports, makes troubleshooting faster, and extends the life of your cables and equipment. Inside the cabinet, use horizontal cable managers between rack units to prevent cable sag across patch panels and switches. Outside the cabinet, use conduit or cable raceways along the wall to keep runs neat and protected. Label every cable at both ends before the cabinet is fully loaded. It sounds tedious, but anyone who has had to trace an unlabeled cable through a fully populated enclosure during an outage understands why labeling is non-negotiable.
Common Mistakes to Avoid When Mounting Electronics Cabinets
A few installation errors come up again and again across professional and DIY installs. Mounting into drywall without hitting studs is the most dangerous one, since failure can happen suddenly and without warning under load. Ignoring weight distribution inside the cabinet is another, because loading heavy equipment at the top raises the center of gravity and increases stress on mounting points. Using undersized screws or generic hardware instead of rated fasteners is a shortcut that may hold initially but fails under vibration or thermal cycling over time. Finally, skipping the level check costs a lot of rework later, especially in rack setups where alignment affects how equipment slides in and out of rails.
Maintenance and Long-Term Reliability Considerations
Once the cabinet is mounted and loaded, the work is not entirely finished. Periodic checks on mounting fastener tightness are worth scheduling, especially in environments with vibration from HVAC systems or foot traffic. Inspect the interior for dust buildup, which reduces airflow and contributes to premature equipment failure. Check that ventilation fans, if present, are operational and that the fan filters are clean. Review cable management every time equipment is changed, since retrofitted cables often get routed haphazardly and can block airflow or strain connections over time. A wall-mounted electronics cabinet that is properly maintained will outlast the equipment inside it multiple times over.
Why Monoprice Is the Right Partner for Your Electronics Cabinet Installation
When it comes to sourcing the right mounting hardware, cabinets, and accessories, the difference between a reliable install and a frustrating one often comes down to product quality and availability in one place. Monoprice has built a strong reputation among IT professionals, AV integrators, and home technology enthusiasts precisely because the product lineup is broad, the specs are honest, and the pricing does not require compromise. Whether you need a wall-mount bracket rated for a heavy network enclosure, quality patch cables for clean rack runs, or cable management hardware that actually works at scale, it is all available without navigating multiple vendors. If you are ready to build a smarter, cleaner, more reliable installation from the start, explore the full range of professional wall-mount electronics cabinets and installation accessories that Monoprice offers for both residential and commercial applications. The combination of performance-grade construction and straightforward value makes it a practical choice for anyone serious about doing this right the first time.
Frequently Asked Questions About Mounting Wall Cabinets for Electronics
How much weight can a wall-mounted electronics cabinet safely hold?
This depends on the cabinet's rated load capacity and the wall structure it is anchored to. Most residential wall-mount cabinets are rated between 50 and 200 pounds. Always confirm that the mounting bracket and fasteners are rated to match or exceed the cabinet's listed capacity, and that at least two studs or solid anchors support the installation.
Do I need to hit wall studs to mount an electronics cabinet?
Yes, for wood-framed walls, mounting into studs is the standard requirement for any load-bearing installation. If studs are not accessible in your preferred location, use toggle bolts or cavity anchors rated for the full weight of the loaded cabinet, but stud mounting is always the more reliable option.
What is the best height to mount a wall cabinet for electronics?
The ideal height allows for comfortable access to equipment without requiring a ladder during regular maintenance. For most setups, the bottom of the cabinet positioned between 48 and 60 inches from the floor works well for standing access, though rack access requirements and room layout may shift this up or down.
Does a metal electronics cabinet need to be grounded?
Yes. Any metal enclosure housing active electronics should be bonded to an electrical ground to prevent static discharge buildup and reduce shock hazard risk. Most professional rack cabinets include a grounding lug for this purpose. Always follow local electrical codes for commercial installations.
How do I prevent overheating in a wall-mounted electronics cabinet?
Ensure the cabinet has adequate ventilation by using a model with built-in vents or fan mounting options. Leave space between rack units for airflow, avoid sealing cables in ways that block internal circulation, and consider active fan units for cabinets housing switches, routers, or amplifiers that generate significant heat.
Can I mount a wall cabinet on drywall without studs?
Not recommended for any meaningful load. Standard drywall has very limited pull-out resistance and will fail under sustained weight, especially with vibration over time. If stud mounting is not possible, use heavy-duty toggle anchors specifically rated for the full loaded weight of your cabinet, and consider distributing the load across a plywood backer board first.
What tools do I need to mount an electronics wall cabinet?
At minimum you will need a stud finder, power drill with appropriate bit sizes, a level, measuring tape, and the correct driver for your fastener type. For concrete or masonry mounting, a hammer drill and masonry bits are required. Having a second person available to hold the cabinet during alignment is strongly recommended.
How do I manage cables in a wall-mounted electronics cabinet?
Use horizontal cable managers between rack units to guide cables neatly across the front of the enclosure. Route external cables through brush strip pass-throughs or conduit along the wall. Label every cable at both ends before populating the rack fully, and avoid bundling power and data cables tightly together in the same channel to minimize interference.
What is the difference between an open-frame rack and an enclosed wall cabinet for electronics?
An open-frame rack offers better airflow and easier front-and-rear access but provides no physical security or dust protection. An enclosed wall cabinet protects equipment from dust, accidental contact, and unauthorized access, making it better suited for shared spaces, offices, or environments where cleanliness and security matter. The right choice depends on your specific environment and maintenance needs.
How often should I inspect a wall-mounted electronics cabinet after installation?
A visual and physical inspection every six to twelve months is a reasonable baseline for most environments. Check that mounting fasteners remain tight, verify that ventilation is unobstructed, inspect cables for stress or damage, and confirm that the cabinet is still level and fully secured to the wall. Environments with high vibration or temperature fluctuation may warrant more frequent checks.


